Quickstart Bridging
Prerequisites
Make sure you have installed and configured the holograph CLI before continuing.
Deploying a Collection
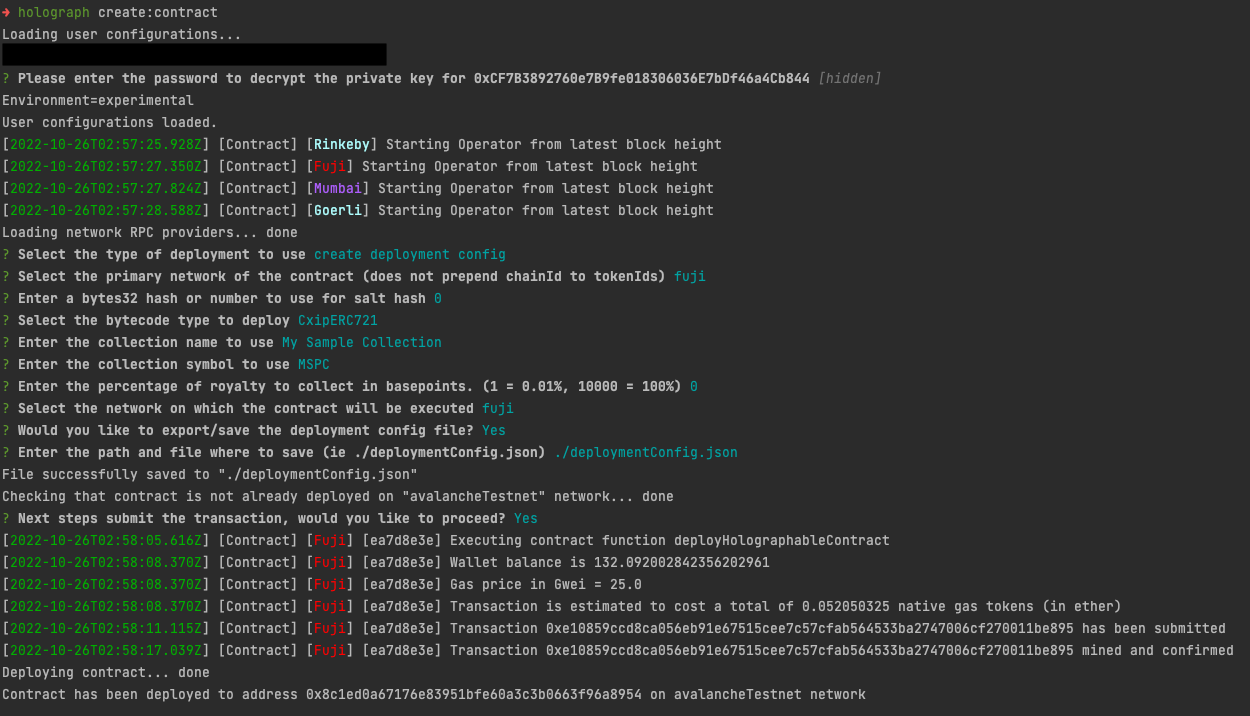
A Holographable Collection contract must be deployed to the blockchains of your choosing. We create a Collection Config object that is saved to your system that can be used as a reference. To get started, run the holograph create:contract command and follow the prompts. You will be asked:
- Enter the password of the wallet you configured
Select the type of deployment to use- SelectCreate deployment configurationSelect the primary network of the contract (does not prepend chainId to tokenIds)- Select the network on which to deployEnter a bytes32 hash or number to use for salt hash- This is a salt value. You can use any value. We recommend 1 to startSelect the bytecode type to deploy- SelectCxipERC721Enter the collection name to use- Enter the Collection NameEnter the collection symbol to use- Enter the Collection SymbolEnter the percentage of royalty to collect in basepoints. (1 = 0.01%, 10000 = 100%)- Select a numerical value. You can set to0if desiredSelect the network on which the contract will be executed-Would you like to export/save the deployment config file?- EnterYEnter the path and file where to save (ie ./deploymentConfig.json)- Enter file name, e.g.,./deploymentConfig.jsonNext steps submit the transaction, would you like to proceed?- EnterY
From there, the CLI will submit a transaction and output the address of the collection (e.g., 0x8c1ed0a67176e83951bfe60a3c3b0663f96a8954). This address is required for minting NFTs.

Minting an NFT
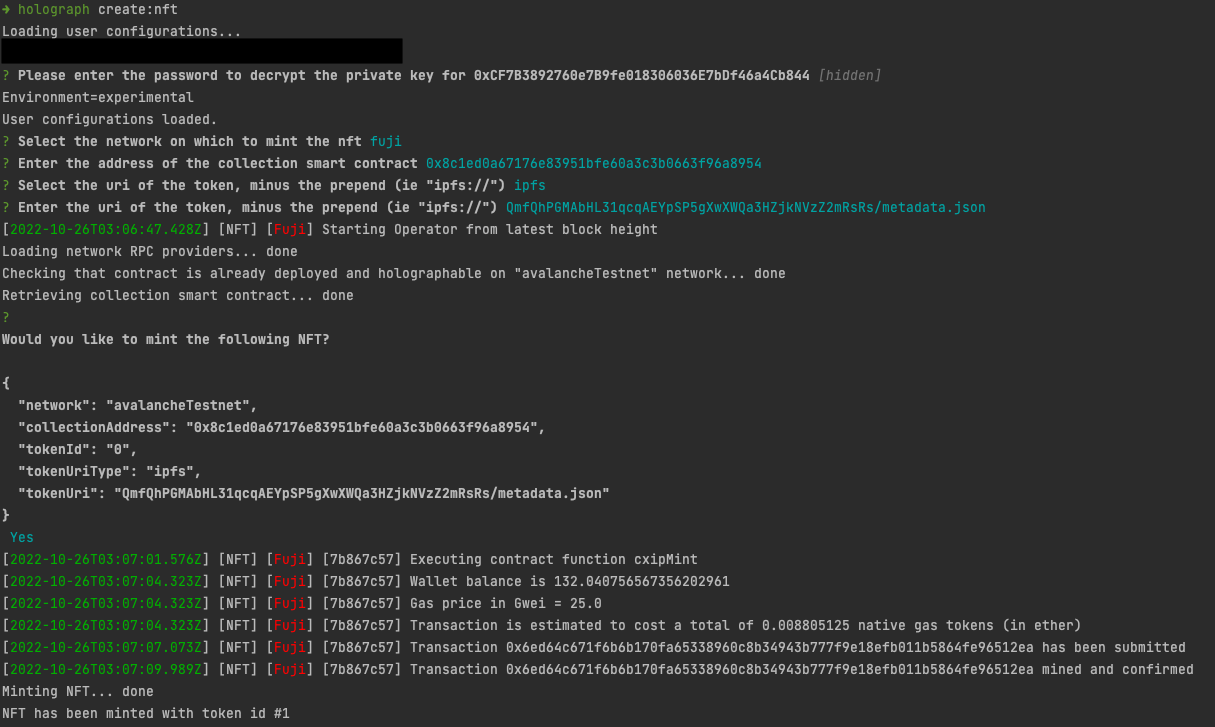
With your collection deployed, you will now be able to mint an NFT. You will need to have the collection address, network, the IPFS hash to the metadata file.
Select the network on which to mint the nft- Enter the network of the collection. Select Fuji if you are following the previous exampleSelect the uri of the token, minus the prepend (ie "ipfs://")- Select IPFS (this can also be an HTTPS URL)Enter the uri of the token, minus the prepend (ie "ipfs://")- Enter the IPFS hash of the metadata file, e.g.,QmfQhPGMAbHL31qcqAEYpSP5gXwXWQa3HZjkNVzZ2mRsRs/metadata.jsonWould you like to mint the following NFT?- Final check if you want to mint the NFT. EnterY. Notice that we output a sample output for validation. The token ID will be created on-chain.
The CLI will submit a transaction and output the status of the minted NFT.

Deploying Collections to Additional Blockchains
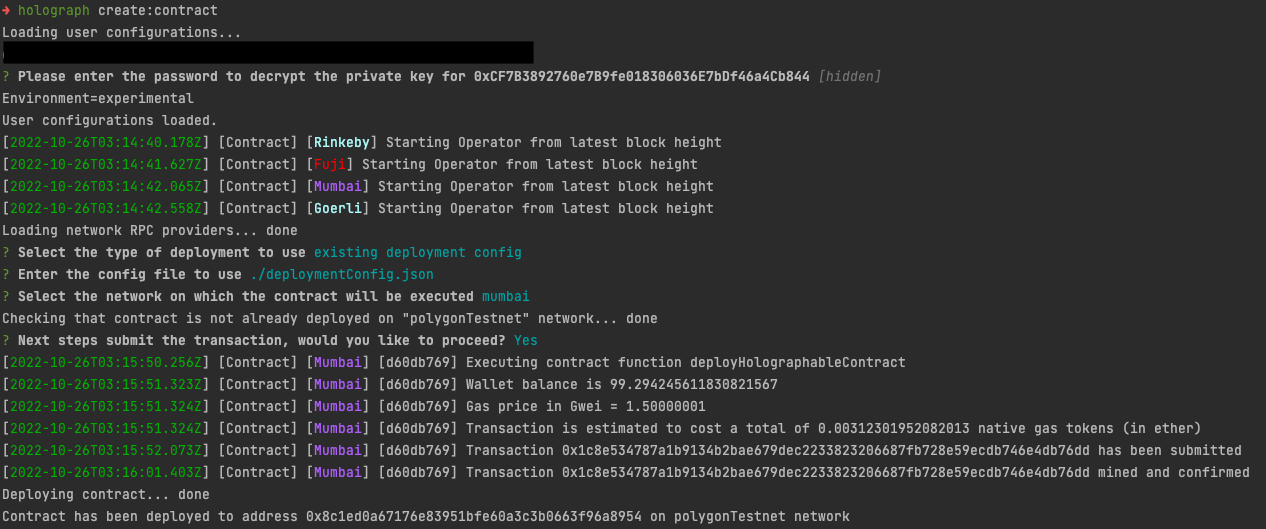
To bridge an NFT between blockchains, the collection must exist on both the source and destination chains. To deploy again, run holograph create:contract, but this time select the Use existing deployment configuration option from the CLI guide.
Select the type of deployment to use- SelectUse existing deployment configurationfrom the listUse existig deployment configuration- Enter the file you created above. For example./deploymentConfig.jsonSelect the network on which the contract will be executed- Select a secondary network to deploy the collection. For exampleMumbaiNext steps submit the transaction, would you like to proceed?- EnterY
The CLI will submit a transaction and display the results.

Bridging an NFT
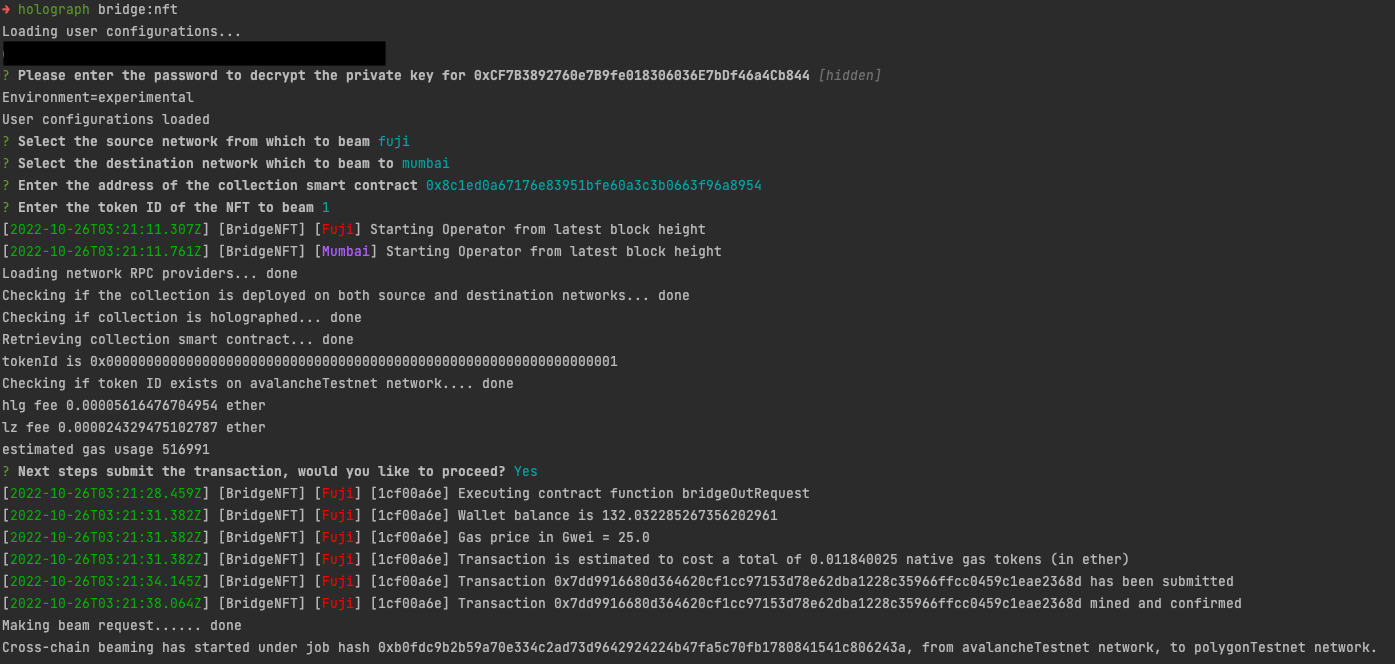
With your collection deployed on two blockchains and an NFT minted, you will be able to call holograph bridge:nft to send it to another blockchain.
Select the source network from which to beam- Selectfuji. This is the blockchain on which the NFT currently existsSelect the destination network which to beam to- Selectmumbai. This is the blockchain to where the NFT will bridgeEnter the address of the collection smart contract- Enter the collection addressEnter the token ID of the NFT to beam- Enter1if you are following this quickstartNext steps submit the transaction, would you like to proceed?- EnterYto submit the transaction
The CLI will submit a transaction to Fuji. After a few minutes the NFT will become available on Mumbai.

That's It
You have now deployed your holographable collection to multiple networks and bridged the NFT between them!